Food Drawing
Food drawing is not about difficult shapes — it is about one shape repeated: the ellipse that turns a flat plate into a view of a plate.
Food drawing looks like the friendliest subject in the whole sketching world. Nothing in a kitchen has to be anatomically correct, nothing has to be balanced on one leg, and nobody is going to notice that your apple is a millimetre off. And yet plenty of beginners who can draw a convincing house stall completely on a bowl of fruit — not because the shapes are hard, but because they assume the shapes are flat.
The mistake is predictable once you see it. A plate gets drawn as a circle. A cup gets drawn as a rectangle with a circle sitting on top. A bowl gets drawn as a half-circle. In every one of those cases the drawn object is a diagram of the thing rather than a view of it: real plates, cups and bowls are seen at an angle, and an angled round edge is an ellipse. Food drawing lives or dies on that one shape, which is also why this subject is far more teachable than it first appears — there is a single mechanic to learn, not a hundred.
The second blind spot is stacking. Most of the food people actually want to draw — a sandwich, a burger, a slice of cake — is a stack of layers rather than a silhouette, and it is the arrangement of those layers that makes the drawing read. Trace the outer outline of a burger and you get a brown blob; draw the bun, the patty and the fillings as separate volumes pressed together and you get a burger, even before a single colour goes near it. In food drawing the layer lines do more work than the outline ever will.
Third, texture keeps arriving too early. Sesame seeds, crust crumb, the shine on a cherry — those are the fun part, and they are also the part that hides a wrong shape instead of fixing it. Every speck of texture you add sits on top of whatever volume is already there, so a plate drawn slightly too deep stays too deep no matter how well the crumb is rendered. Put texture in last and it can only ever improve the drawing; put it in first and it becomes camouflage.
So the working order is fixed. Place the ellipse that carries the food, give that ellipse a side and a bottom so it becomes a volume, stack the layers on top of it, add texture, then finish with one small shadow or block of colour that seats the whole thing on the table. Five steps, and they are the whole of food drawing.
One variable controls the viewpoint, and it is the ellipse again. Seen from the side, a plate is a very flat ellipse — nearly a straight line. Seen from directly above, that same plate is close to a true circle. Everything in between is just how wide you draw the one shape. Set that flatness before you draw anything else and you can put a plate on any surface at any height without measuring a thing; get it wrong and no amount of careful drawing afterwards will convince the eye that the plate is lying down. Food drawing rewards deciding this first more than it rewards a steady hand.
None of it needs special software. GetDoodling opens on a blank canvas with no sign-up, runs in any current browser, and lets you download the finished drawing or publish it to the public gallery when you want a second opinion. Work large and zoom out often — food drawing is a subject where the volumes read at thumbnail size, and texture only starts to matter after they do.
How to Draw Food in 5 Steps
Five steps in a fixed order — the ellipse first, texture last, and no skipping ahead to the fun part.
-
Step 1: Draw the Ellipse That Carries the Food
Start with whatever the food sits on, and draw only its top edge — one flat ellipse, no sides, no bottom, nothing inside it. A plate seen at table height is a wide, flat ellipse; a bowl is a smaller one; a glass is narrower still. Hold the flatness consistent across everything on the same surface, because the eye reads a shared angle as a shared table and any mismatch as a mistake. Keep the line light and slightly overshoot where the ends meet, which makes a cleaner join than trying to stop exactly on the start point. This single shape is where every food drawing begins, and it is worth spending a minute on it before anything else goes down.
-
Step 2: Give the Ellipse a Side and a Bottom
An ellipse on its own is a hole. It becomes a volume the moment you drop two vertical sides from its widest points and close the bottom with a second ellipse of the same flatness — which is all a plate, a mug or a bowl actually is: two ellipses and a pair of sides. Draw the bottom ellipse slightly narrower than the top one for anything the eye can see into, and the same width for anything tall and shallow. The trick with food drawing is that you are not drawing the object, you are drawing the two ellipses that describe it, and everything the eye reads as "plate" is contained in how those two curves relate. Keep them on one centre line — a top ellipse and a bottom ellipse that drift sideways to each other will tip the whole object over, and that mistake is almost invisible at full zoom but obvious the moment you look at the drawing from across the room.
-
Step 3: Stack the Layers Off That First Ellipse
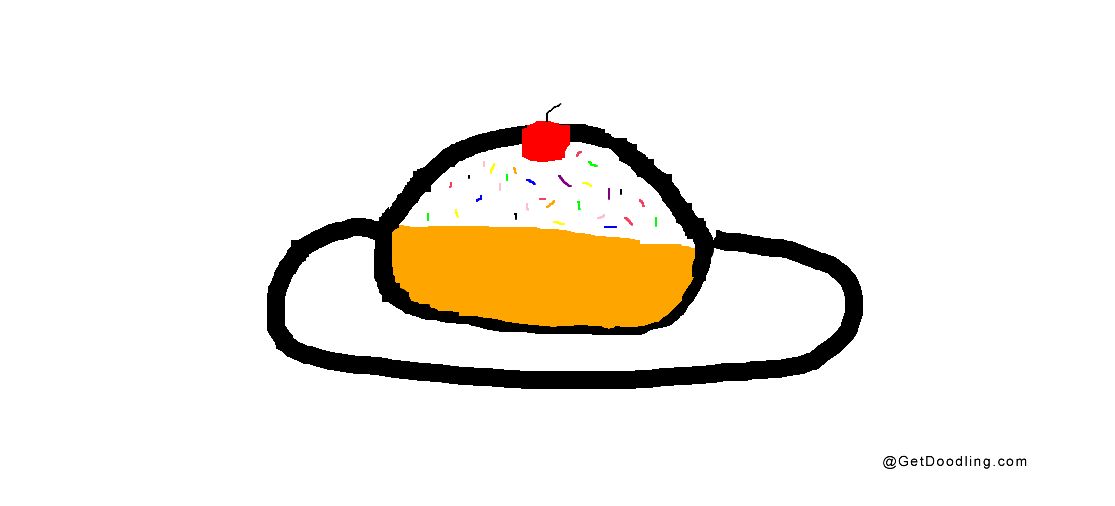
Anything built on top of the ellipse — a burger, a sandwich, a slice of cake, a stack of pancakes — is drawn as layers rather than as an outline, and each layer is just a top curve and a bottom curve of its own. Start at the bottom and work up, leaving a visible thickness between one layer and the next so they read as separate things pressed together; if two layer lines touch and merge, the whole stack flattens into a single shape and the drawing loses the thing that made it interesting. Flattened layers, like a leaf of lettuce or a smear of sauce, get drawn as an irregular wavy line, which is what stops a stack from looking machine-made. Four to six layers is the useful range — past that they stop reading as separate and start reading as mush. Note that this is one mechanic, not a method per food: the same layered logic covers a burger, a wedge of cake and a stack of pancakes, and none of them needs its own tutorial.
-
Step 4: Add Texture Only After the Volume Reads
Now the fun part, and it comes last for a reason. Crumbs, seeds, glaze and shine are all applied on top of whatever volume is already sitting there, so they improve a correct drawing and disguise a wrong one. There are three kinds worth knowing. Grain — sesame seeds, sugar, crumb — is drawn as tiny marks that follow the curve of the surface rather than sitting in a flat scatter, because grain on a curved bun fans out and grain on a flat plate does not. Shine is not drawn at all; it is the surface you leave alone, a small curved gap in the shading where the light hits, and it is far more convincing than any white mark laid over the top. And skin — bread crust, the edge of a pie, a baked surface — is best suggested with short broken strokes along the form, not a continuous outline, because a hard line around a soft food makes it look like plastic.
-
Step 5: Seat It With One Shadow
Finish with a single decision: where the food touches the surface. The contact shadow, that narrow dark line pressed right up against the base of the ellipse, does more for food drawing than any amount of rendering elsewhere, because it is what tells the eye the object is sitting on the table instead of hovering above it. Put a small soft shadow just under the bottom edge, darker where the object meets the surface and fading as it moves away, and resist the urge to add a second long cast shadow in a different direction. If you want colour, one flat block at the darker end of the object's own hue will read better than a gradient built from three, because the shading in a small drawing is doing much less work than the shape is. Aim for a drawing that looks finished at thumbnail size, and it will hold up at any size above that.
Easy Food to Draw
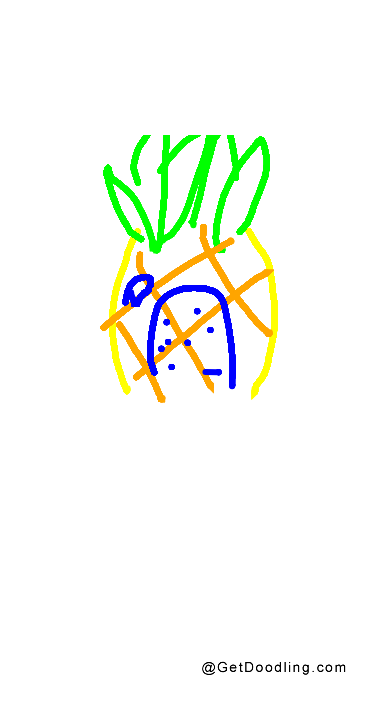
The way to make food drawing easy is not to draw faster or sketchier — it is to pick subjects whose shape does the work for you. Anything with a strong, familiar silhouette and a simple volume will read clearly with almost no detail: a whole fruit, an egg, a loaf, a filled cup. Anything with a fussy outline and a lot of small parts — a bowl of noodles, a plate of spaghetti — will stay hard no matter how much time you give it. Below are the variations that get the most out of the least measuring, and each is a finished drawing rather than a warm-up.
Easy Food Drawing
Choose by silhouette, not by taste. Round forms with one clear ellipse — an orange, a tomato, a doughnut — are the easiest useful practice there is, because a single shape has to be right and there is nothing to hide behind. Add one detail that identifies the food — a stem, a segment line, a hole — and stop. The discipline that makes easy food drawing actually easy is refusing the second and third details, since a simple subject loaded with extras becomes a hard subject with no reward.
Cute Food Drawing
Cuteness in food drawing comes from two edits and no others: make the food slightly too small for its personality and give it a face. A stack of pancakes with two dots and a small curve sitting near the front reads as a character instantly, and the face follows the same placement rule as any other — eyes low on the form, not centred. Keep the limbs, if you add any, as simple tapering shapes with no joints, and let the food's own outline stay exactly as it is. Change the proportions and the expression, never the structure, and the drawing stays recognisably the food while becoming something with a mood.
Kawaii Food Drawing
Kawaii narrows cute further: rounder, smaller, more symmetrical, and calmer in the line. Push every corner out until the form is almost a circle or a soft square, make the features tiny and evenly spaced, and drop the line weight thin and even across the whole drawing — kawaii food drawing looks soft because the line never thickens or breaks, not because the drawing is simple. Colour helps and is usually pale: two or three soft tones with no shading at all. Skip texture and skip shadows; the flatness is part of what makes this style read.
Food Sketch
A sketch has a different job from a finished drawing, and judging it by finished standards is why people give up on them. Give yourself two or three minutes, work small, and go straight for the outline and the layer lines with no construction — then add shading with quick parallel strokes laid along the curve of each volume rather than smudged across it. Food sketch practice is about training the eye to catch a silhouette fast, and the drawings are meant to look provisional. Working in a sketchbook with others around it also flatters them, which is the honest reason sketchbooks work.
Food Doodle
The doodle is the smallest useful unit in food drawing and the one worth filling pages with: one object, one shape, ten seconds, no shading, no shadow. Its real advantage is repeatability — because each one costs almost nothing, you can draw the same subject twenty times and try a different simplification on each, which is how you actually find the version that reads best. Doodles also tile: a row of small food drawings drawn at a consistent size and line weight makes a usable pattern, which is why this style turns up so often on stickers, stationery and printed fabric.
Every version above works on the same canvas, and none of them needs a sign-up or an install. GetDoodling opens straight onto a blank page, so you can block in the ellipse at a comfortable zoom, check the stack at thumbnail size, and only then come back in for the texture. Download what you finish, or publish it to the public gallery if you would rather compare proportions with other people's drawings than guess at them — food drawing is a subject where seeing a row of attempts side by side teaches faster than any single one will.
Food Drawing Tips
Match the Flatness of Every Ellipse on the Table
Perspective in food drawing is carried by one number: how open the ellipse is. Everything sharing a surface has to share that opening, or the eye reads the mismatch as a mistake even when it cannot name it. If the plate is a wide, flat ellipse and the mug beside it is nearly a circle, the mug looks tipped toward the viewer on a table that is somehow level. Check it the cheap way — hold the drawing at arm's length, or look at it at thumbnail size on the canvas. A shared angle reads as a shared table instantly; a disagreement stands out at that distance even when both shapes look reasonable close up.
Weight the Near Rim and Thin the Far One
Nothing separates a drawn bowl from a drawn circle faster than varying the line that describes its top edge. The front half of the rim sits closer to you and takes the heavier stroke; the back half curves away, so it thins and can even break where the far side is partly hidden. This is observation rather than shorthand — the near edge of a real bowl genuinely sits in sharper focus than the far one — and it costs nothing but a moment of attention. Applied to a stack, the same rule keeps the outline of the front layer crisp while the outlines behind it thin out, which is most of what makes a drawn burger look like it has depth rather than being a set of stripes.
Decide the Light Before You Shade
Pick a direction the moment the volume is on the page — upper left, say — and never contradict it. Every curved surface in the drawing then has its lit side on the left and its shaded side on the right, and that consistency is what makes shading look like light rather than like dirt. It also gives you the highlight for free: on anything glossy, the shine is simply a patch you leave unshaded on the lit side, best pulled into a slight curve that follows the form. Add shading in the same direction on every object, and the whole food drawing sits under one light. Change it between objects and the drawing looks assembled rather than observed.
Group the Busy Parts Instead of Drawing Every Strand
The foods with the most detail are the ones that punish detail, and food drawing has no more useful habit than this one: stop drawing individual strands and start drawing groups. A bowl of noodles is not four hundred lines, it is eight or ten clumps with a few loose strands escaping at the edge; rice is a suggested surface with three or four grains drawn properly and the rest left as texture. The eye supplies the rest, and it supplies it better than you can — a page covered in even, individually rendered strands reads as a pattern rather than as food. Draw the edge of the mass carefully, where it meets the bowl, and let the interior stay quiet. Dense subjects reward restraint more than patience.
Off-Centre Beats Dead Centre
A plate dead in the middle of the canvas, with the food perfectly centred on the plate, is the fastest way to make a correct drawing look like a diagram. Shift the group slightly off the middle, let one plate run partly off the edge of the page, and overlap things so one object sits in front of another. Overlap is doing real work here rather than just filling the composition, because a plate cutting across the front of a bowl tells the eye which of them is nearer — the depth cue comes free with the arrangement. Leave a little more empty surface on one side than the other and stop; food drawing does not need a whole table drawn to look like one.
Food Drawing FAQ
What Is the Easiest Food to Draw for Beginners?
Anything that is one round volume with a strong silhouette: an egg, an orange, a tomato, a doughnut, a whole loaf. Each is a single shape that has to be correct and nothing else, so there is no way to hide a mistake and no pile of detail to absorb your attention. Start with one of those, drawn in five minutes, and use it to practise the ellipse rather than to make a finished picture. Once the shape reads clearly at thumbnail size, add the one detail that names it — a stem, a segment line, a hole — and stop there. Food drawing gets hard because people start with the complicated subjects, not because the subject matter is complicated.
How Do You Draw a Plate Seen from Above?
Draw a true circle and then put everything on it — nothing else changes. Seen from directly overhead, the rim of a plate is a circle rather than an ellipse, and every item sitting on it still needs its own round surfaces drawn in the same plane, which the eye reads as being seen from the same angle. The failure mode is mixing the two views: a circular plate with a mug beside it drawn as though it were seen from table height looks impossible, because the picture is claiming two viewpoints at once. Pick the top-down view or the table-height view before you start, and keep every round edge in the drawing obeying whichever one you chose.
Why Does My Food Drawing Look Flat?
Almost always because a round top was drawn as a circle when it should have been an ellipse, so the object reads as a flat shape lying on the page rather than a volume standing on a table. The second cause is a missing bottom edge: an object with only a top ellipse and a silhouette has no way to show its depth. The third is an absent contact shadow, which leaves the object hovering. All three are quick to check and quick to fix, and none of them has anything to do with shading skill — which is why a flat-looking food drawing is usually one measurement away from looking solid rather than needing a complete redraw.
Do You Need Colour to Draw Food?
No, and starting without it is a real advantage. Colour is very good at making a drawing appealing and very bad at telling you whether the shapes work — an apple shaded in the right reds will look convincing long after the form underneath has gone wrong. Work in line and one tone first, and use value rather than hue to describe the volume: darker where the surface turns away, lighter where it faces the light,and grey where it turns neither way. Add one spot of colour at the end if you want it, in the darkest area, and the whole drawing will read as coloured even though almost none of it is. Learning to build form in tone first also means you can sketch food in a waiting room with a single pen and still come out with something that looks finished.
What Tools Do You Need to Start?
Fewer than you think, and none of them are specialist. A pencil and paper will carry you through everything on this page, and a pen will do it too — food drawing is not a subject that needs erasers, because the structure is simple enough to place correctly the first time. Digital tools change the workflow rather than the method: a canvas that lets you undo, zoom out to check proportions and export at any size makes the measuring steps easier, but the ellipse, the layering and the contact shadow are the same conversation on a tablet as on paper. What actually matters is drawing the same subject more than once. Ten apples on one page will teach you more about plate and volume than one beautifully rendered apple ever will.